


For the most part, I am a maximum-effort/maximum-return kind of Mama . . . except when it comes to crafts. In my view, we should execute crafts with minimal (and I mean mi-ni-mal) effort to yield maximum return.
Controversial? Perhaps, but I am also the kid who took one look at the seemingly complex Easter craft that my third grade teacher had planned for an afternoon and promptly went to the nurse complaining of a headache. I never finished my needlepoint pillow in 4th grade, and I absolutely could not be bothered with any arts course beyond photography in high school. Say “scrapbook” and I cringe–visibly.

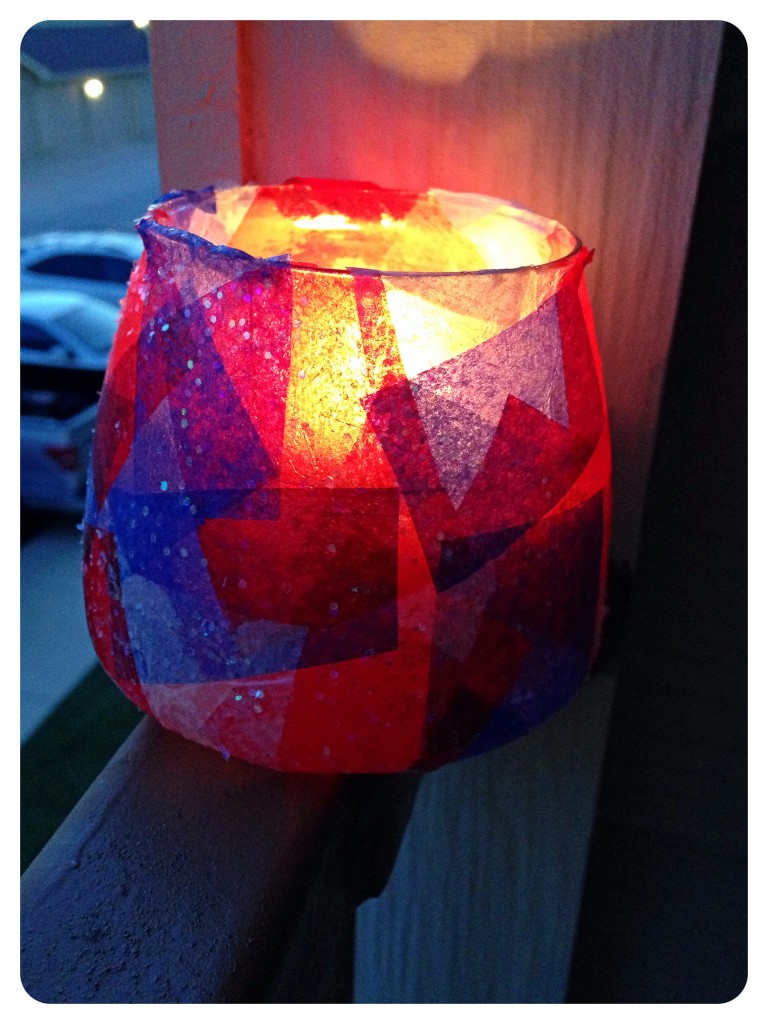
That’s why I love Mod-Podge and tissue crafts. In this medium, you can produce gorgeous pieces with a minimum effort, which is fabulous for reluctant crafters like me AND for the kiddos. These little lanterns–powered by LED tea lights–will look gorgeous indoors and out during your Independence Day celebration (or any other celebration you choose; just change the color of tissue paper).
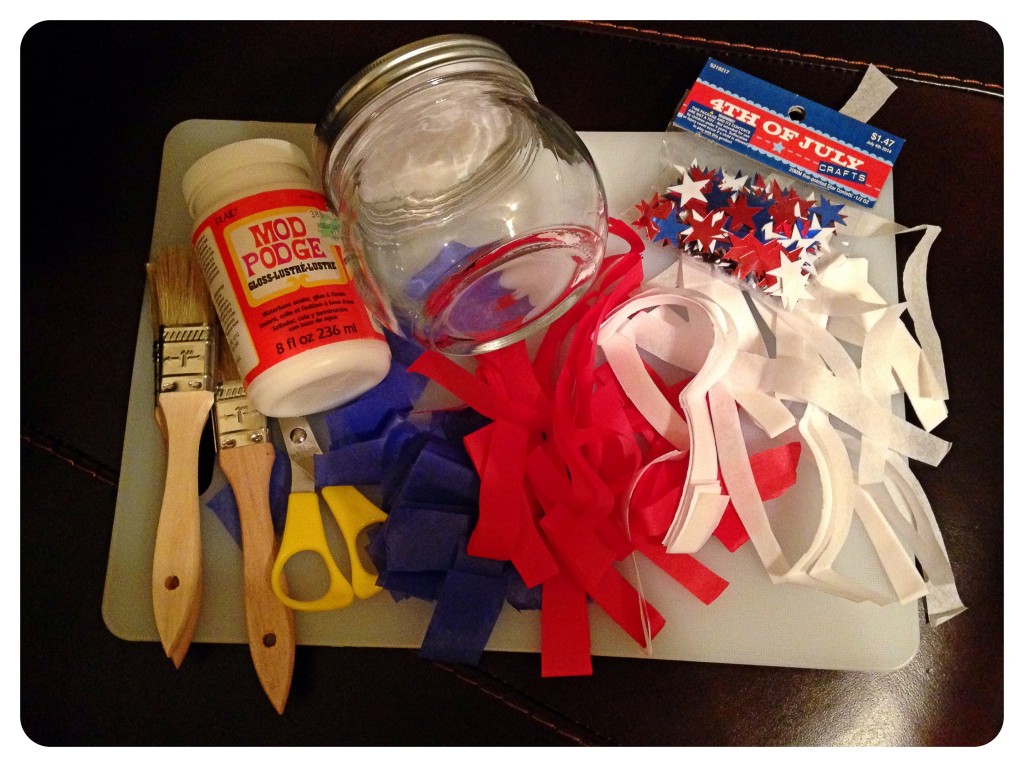
The Tools:
- Glass or Clear Plastic Containers. The final project will end up translucent, so its best to start with clear vessels. Try to choose containers that you can fit your hand into easily as this will allow you and the kiddos to hold the container upside down to apply the tissue.
- Red, White, and Blue Tissue Paper.
- Mod-Podge.
- Small Paint Brushes.
- Scissors.
- LED Tea Light Candles. Please do not use actual candles for this project as the tissue and Mod-Podge could ignite.
- Glitter and/or Confetti. Optional.
The Action:
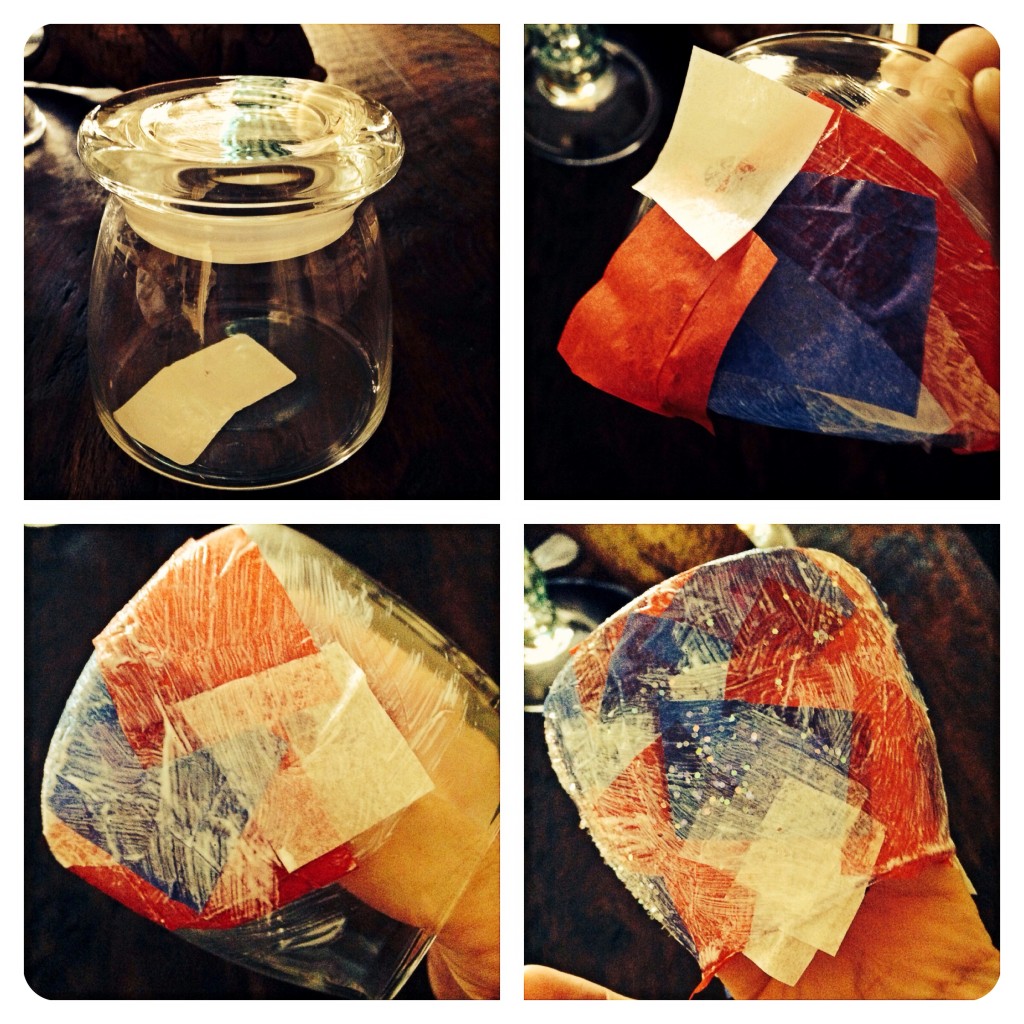
- Cut the tissue into shapes of your choosing. The quickest shape is the square/rectangle, but if you want to be very creative, you can cut stars or use a scissors with a patterned cut (think scalloped edge). This is something that kids can easily do as the shapes do not need to be perfectly even.
- Place a container upside down on your fist or on the table. Dip the brush into the Mod-Podge and brush a bit onto the glass container.
- Place a tissue square or two on top of the Mod-Podge that you just brushed onto the container and then lightly brush more Mod-Podge over the tissue to seal it. The Mod-Podge will go one opaque white, but it will dry clear.
- Repeat the process until the jar is covered in tissue. Be sure to overlap the tissue pieces to create a stained-glass look.
- Turn the jar on its lip (or leave it on it’s bottom if you didn’t add tissue to the bottom) to dry. Add glitter or confetti if you wish by sprinkling it over the wet Mod-Podge. There’s no need to seal the glitter; the Mod-Podge will hold the glitter.
- Allow 3-5 hours to dry.
- When the lantern is completely dry, drop in your LED tea light.
Ta-dah!


