


Been there. Done that. Got the T-shirt. Now what? I mean, wearing the T-shirt comes next, but then what? At my house, all those college shirts for every dance, event, and concert sat folded up in an antique trunk for nearly 30 years.

Find the Time
During quarantine, the pile of T-shirts taunted me into tackling the long dreamed of T-shirt quilt. I know enough to be dangerous on a sewing machine.

So, I’m here to say that T-shirt quilts can be made with questionable sewing skills.
Truth is, the making of my first T-shirt quilt was a love-and-hate endeavor. Now that it’s done, I’ll go out on a limb and call it a hobby. I’m even planning to do another for my youngest child’s high school graduation gift. I’ll spread out the project by working a few hours at a time on each step.
Prepare the T-shirts
- Gather your shirts and decide which ones to use. To make a throw-size quilt, approximately 48 x 64 inches, choose 12 shirts, for three shirts across and four shirts down. To make a full-size quilt, approximately 82 x 96 inches, choose 30 shirts, with five shirts across and six shirts down.
- Next, the shirts need to be cut to a uniform size. I recommend 12 x 12 inch size squares, and you’ll want a large cutting mat and a rotary cutter. DON’T CUT YET. Create a 12 x 12 inch cardboard template, and use a fabric pen to trace on the back of the shirt. Now, when cutting each shirt, and leave a couple of inches all around the marked lines for seam allowance.
- After the shirts are cut, they need an interface on the back to make them sturdy. Trust me: This step makes sewing easier. You can purchase lightweight, iron-on interfacing by the yard at the fabric section of a hobby store. Either Pellon 911FF featherweight or Therm-o-Web heat’n bond are good.
Cut the interfacing to the size of each T-shirt square, and iron it to the back of each shirt square. Use a damp press cloth between the interfacing and the hot iron, like an old tea towel or burp cloth, following the directions on the interfacing. Now, the T-shirts are ready.

Add the Borders
- One- to two-inch borders in between the shirt squares are a common width. I like to use a navy or black cotton fabric, available in the quilt fabrics. Pre-wash the fabric to allow for shrinkage before you use.
Here’s an Internet trick for cutting the border strips: Buy one-inch or or two-inch masking tape, whichever width you’ve chosen. Place the tape on the border fabric in the lengths you need. You’ll need strips between the sides of the T-shirt squares, and strips between the horizontal rows, as well as the top and bottom of the quilt.
- Watch YouTube videos for help on your sewing machine before you stitch anything to get tips on the tension, bobbin, and such.
- Lay out the T-shirts to finalize layout.
Stitch the Top of the Quilt
- Pin each square to a short strip of border on the RIGHT side of each shirt. Leave the masking tape on the strips of border to help you stitch straight lines.
The first square on left of each horizontal row will need a border stitched on the left side.
Next, stitch the shirts together to form each horizontal row. Each row will have one border between the sides of each square.
Pin the top horizontal row to a border strip above it. Repeat this step to connect each row to the row above it, with a border between them as the connection. Add a border to the bottom of the last horizontal row. Use the masking tape again as your guide for straight lines, and voile, the quilt top is done.
- Take the masking tape off, and wash the quilt top to wash out the fabric pen marks.
Add the Back
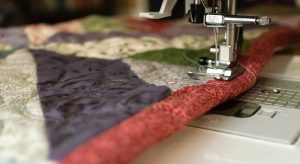
- My big tip for the back is to use minky fabric. We are tactile snobs at our house and love all things soft and cuddly. Because minky is thick, it will be a bit tricky to get through your machine. However, the effort allows you to skip batting.
- Pin the back to the quilt top. Stitch on the borders, and around the quilt edges, all the way around. I also quilted each square in free form stitching around the designs on each T-shirt.
LASTLY, you’ll need to complete the binding around the outside edges. I suggest YouTube videos to choose a technique. It won’t be perfect, but who cares? It’ll be done! And then your new hobby can be snuggling under your new quilt on a rainy winter day.
Post pictures of your finished quilt in the comments!


